Set Up Your D-Link DIR-3040 Router
The best price-quality router for StageWave
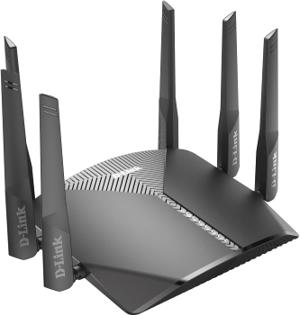
Are you looking for a router to use StageWave with around 6 to 8 wireless connections? The D-Link DIR-3040 Router brings together the features that allow optimal performance at a really affordable price ($70 USD on Amazon).
Note: this model has been discontinued and is increasingly hard to find, but it remains our historic benchmark thanks to its MediaTek chipset. If you can't get one, check our list of current replacements with the same chipset.
This article will guide you through the necessary steps to set up your D-Link DIR-3040 router, avoiding interference with other WiFi networks, resulting in a stable connection that takes no more than 10 minutes.
1. Initial Connection:
Connect your PC or Mac to a LAN port on your router using a network cable. If your PC/Mac does not have a network port, you can use a gigabit Ethernet adapter.
2. Router IP Discovery:
- Windows:
Open the command prompt and typeipconfig. Look for the entry corresponding to your network connection and find the "Default Gateway," which is the IP of your router.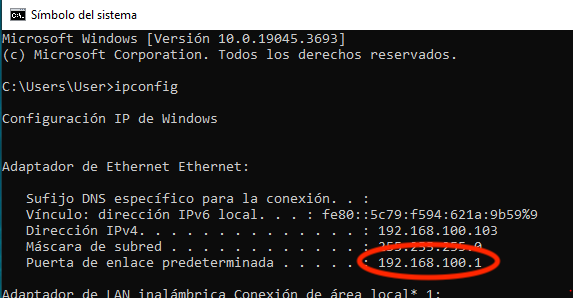
- Mac:
Open the Terminal application and type:
netstat -nr | grep default | head -n 1The IP listed under "Gateway" is the IP of your router.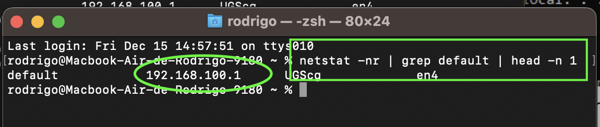
As you can see, in both cases, the IP 192.168.100.1 has been found.
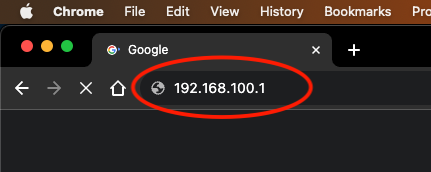
3. Access the Web Configuration Panel:
Open your web browser and enter the router's IP in the address bar. This will take you to the router's web configuration panel. In this case, it will be 192.168.100.1.
Here, you will need to enter the configuration password for your router.
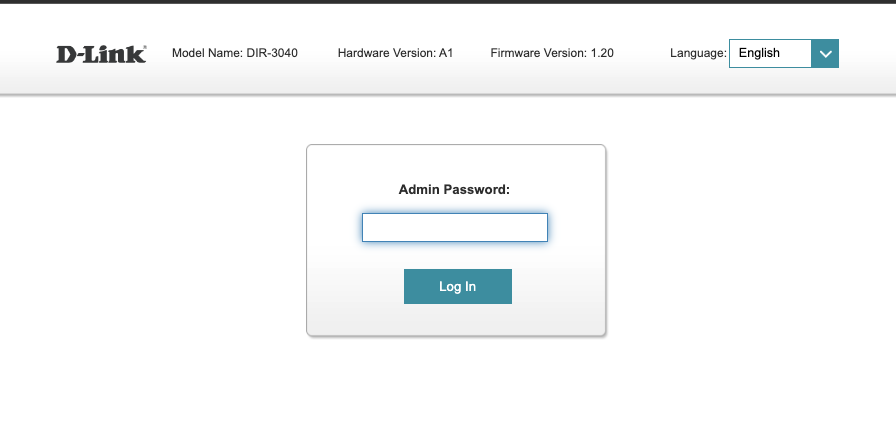
If you haven't set a password, you can use the credentials provided on the configuration card included with your D-Link router.
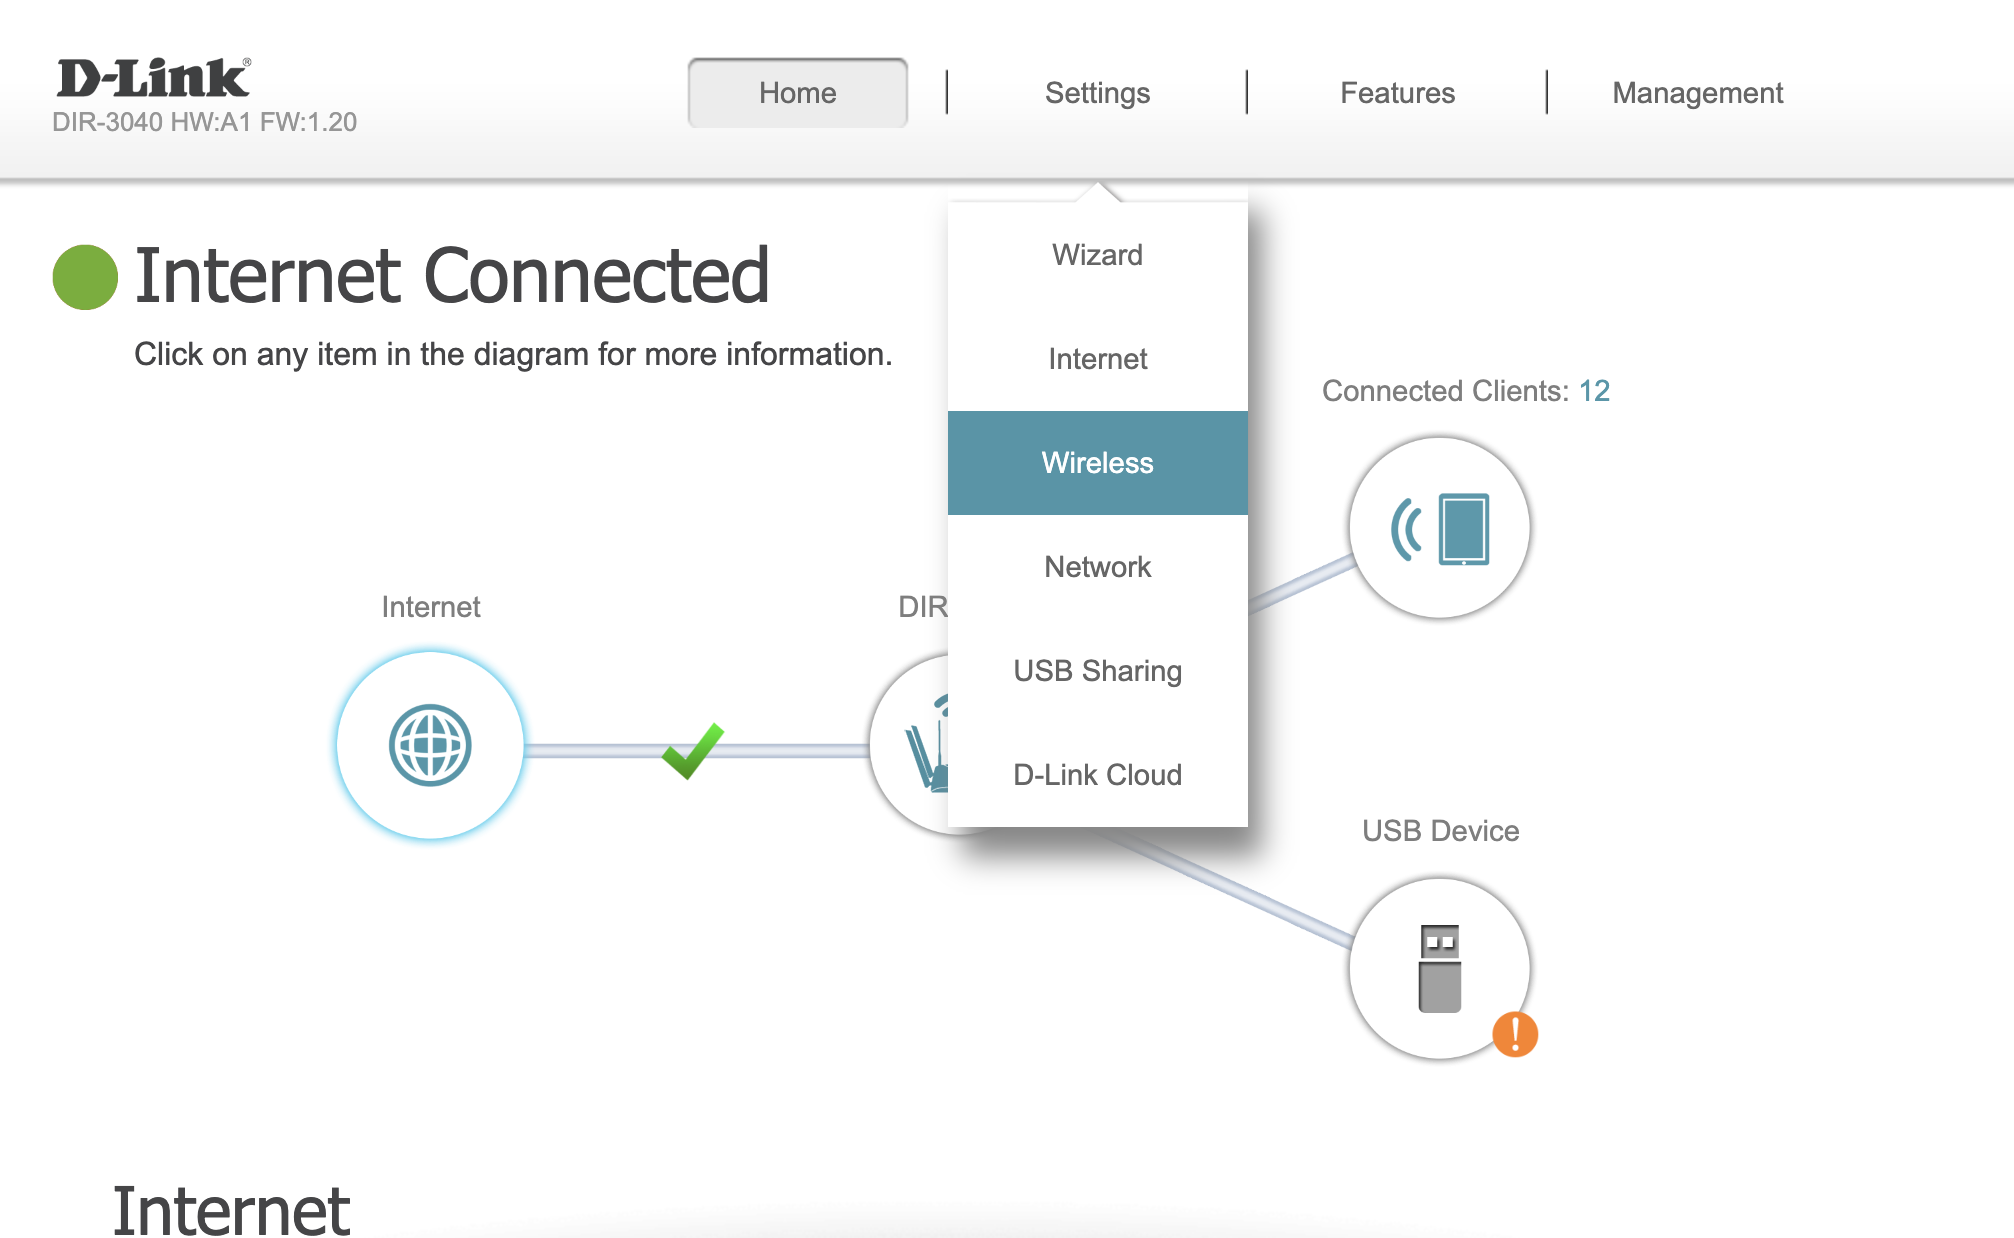
4. WiFi Configuration:
Navigate to the WiFi configuration section. Remember to press the "Save" button after any changes.
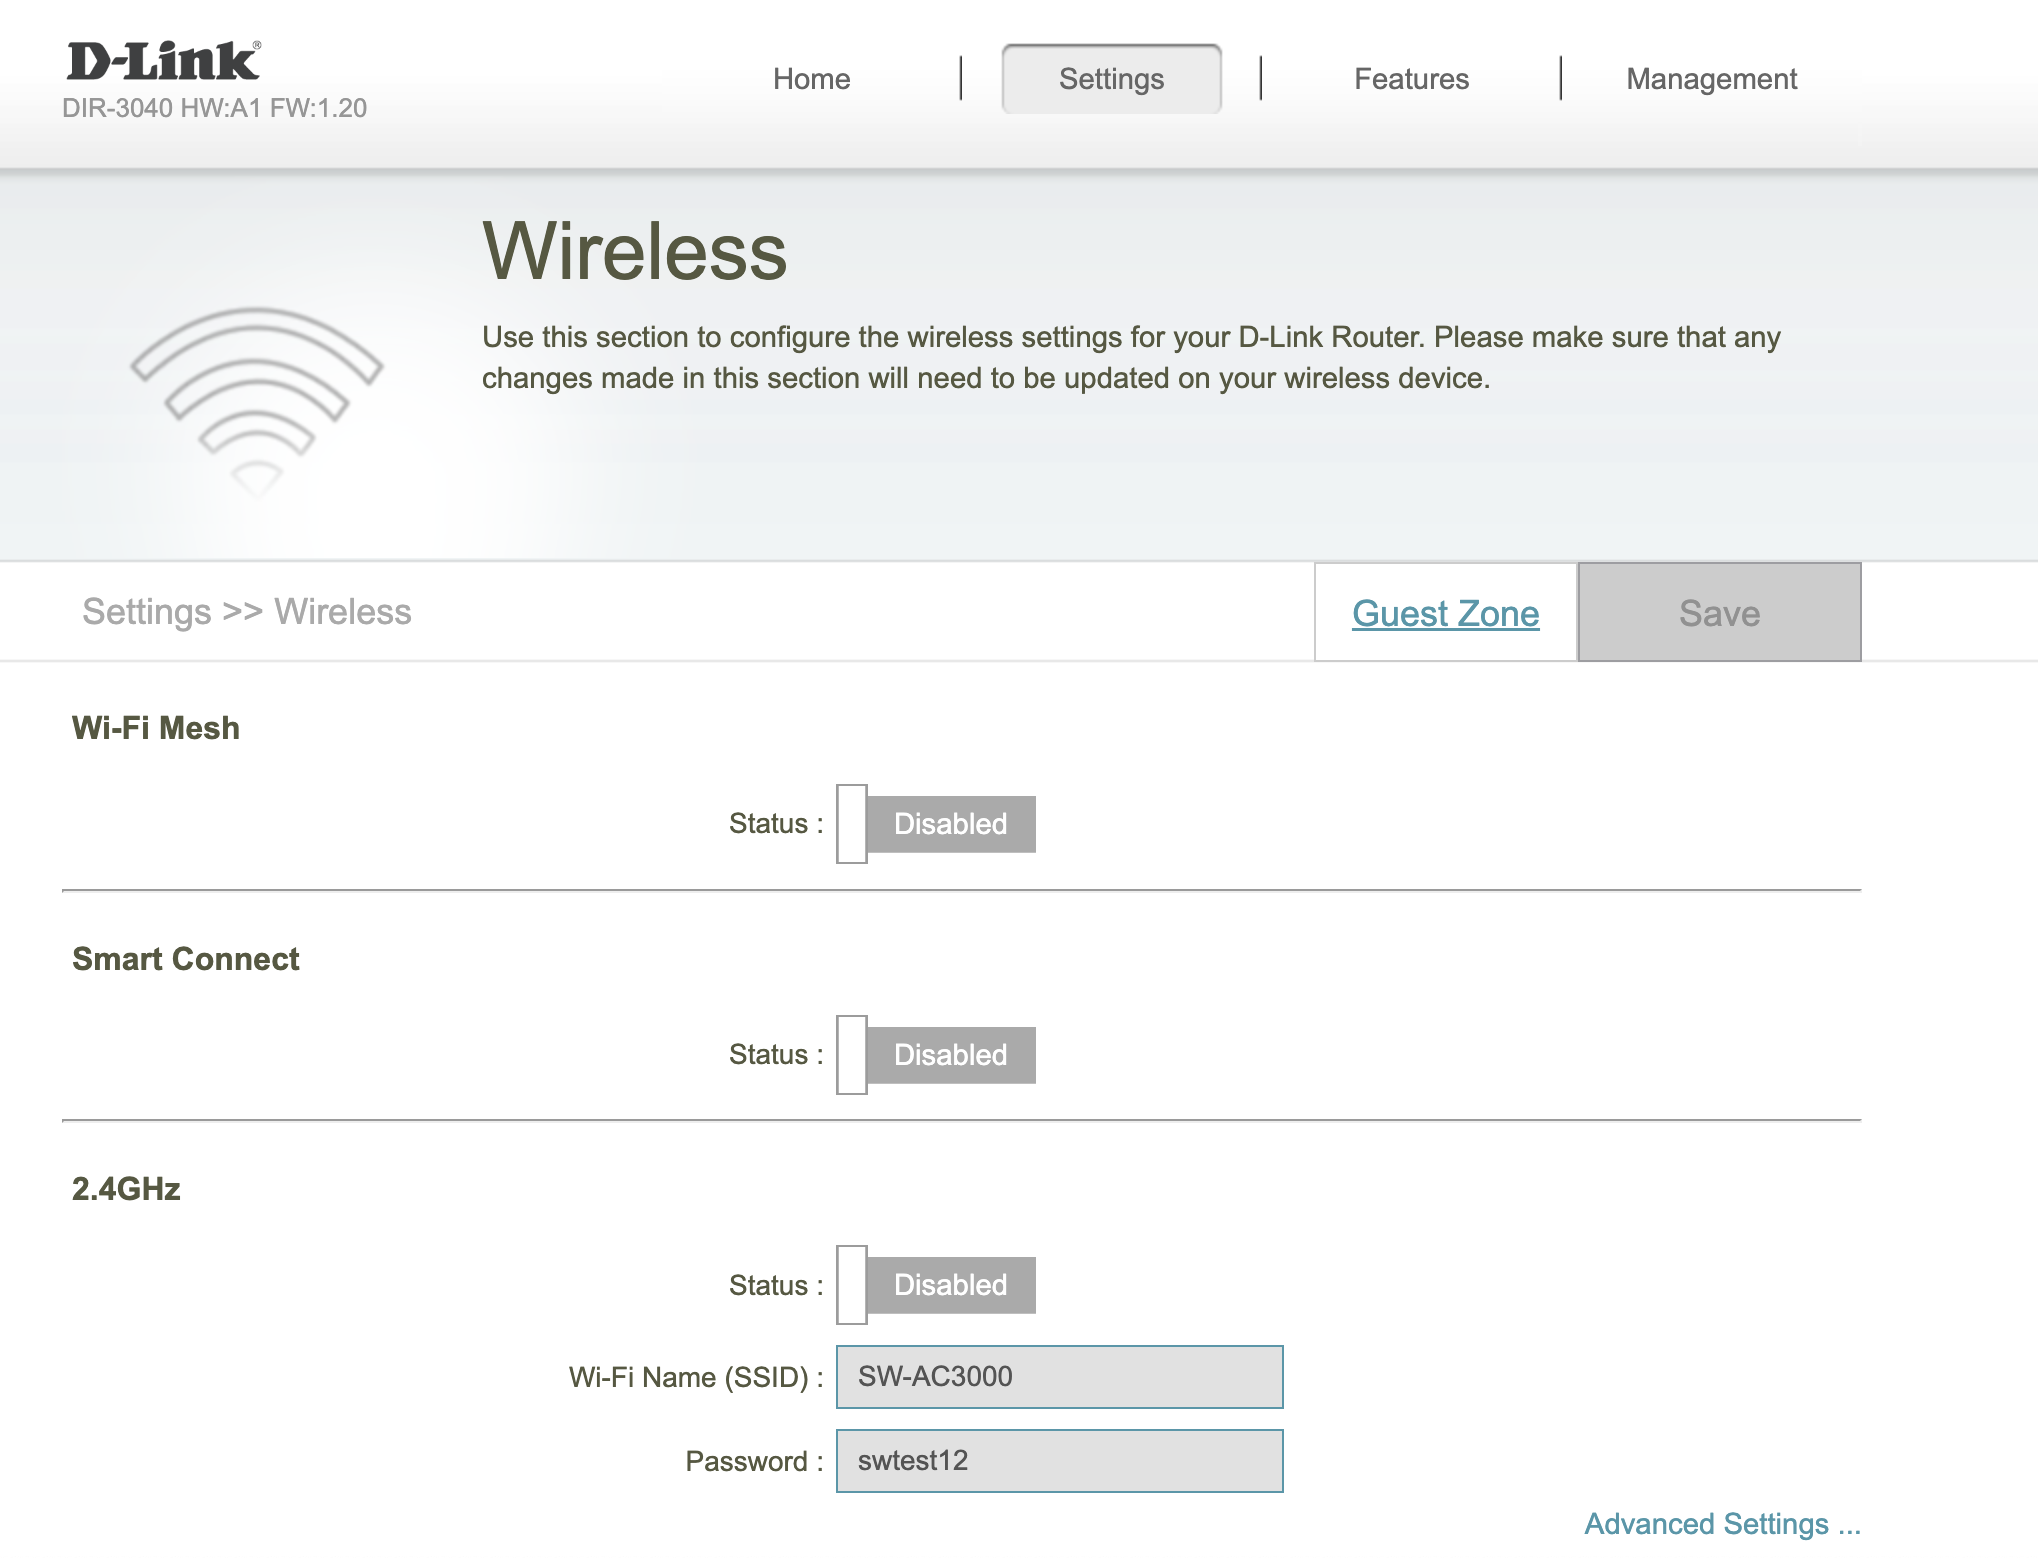
5. Disable Unnecessary Functions:
Turn off functions that won't be used for StageWave: WiFi Mesh, Smart Connect, the 2.4 GHz network to simplify and optimize performance. Also, disable the Wi-Fi Protected Setup option at the bottom of the page.
6. Different Names for 5 GHz Networks:
Assign different names for the 5 GHz 1 and 2 networks. This helps clearly identify each network; in this case, we'll use "StageWave 1" and "StageWave 2."
7. Configuration of the 5 GHz Secondary Network:
Start with the "Secondary" network as it's easier to configure.
To access the advanced configuration mode, click on "Advanced Settings ...".
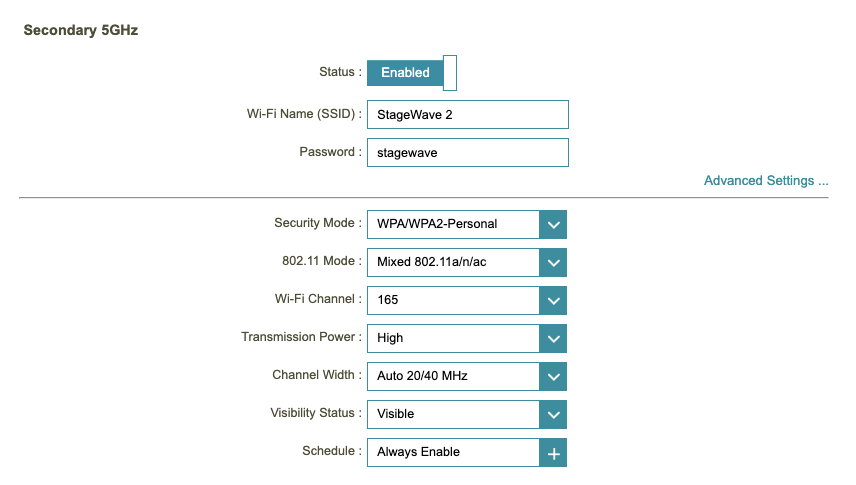
Configure the 5 GHz Secondary network with a bandwidth of 20 MHz and on channel 165. This channel is rarely used and can only be used with a bandwidth of 20 MHz, so the likelihood of it being used by another WiFi network is very low.
8. Configuration of the 5 GHz Primary Network:
This network is more prone to interference with other WiFi networks, so it's crucial to scan WiFi networks in your area to identify a free WiFi channel.
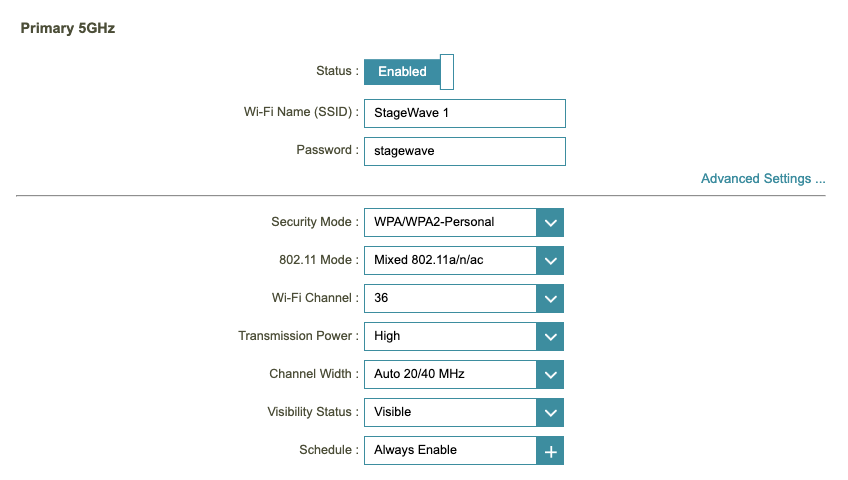
Configure the 5 GHz Primary network with a bandwidth of 20 MHz on the identified free channel. You can see how to scan in this video. In this case, the freest channel was 36; here's how both networks look on the WiFi spectrum.
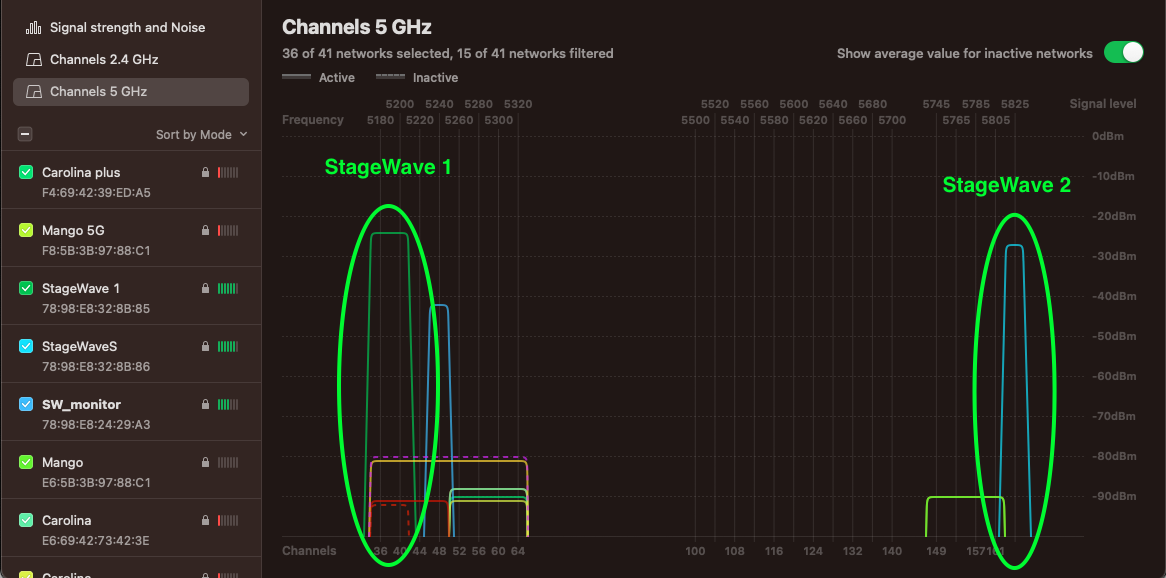
While other WiFi networks on the same channel are observed in the case of "StageWave 1," the signal-to-noise ratio is quite high, around 60 dBm.
Note: If there are other networks operating on the same channel with considerable power but you have access to their management, you can configure those networks to create a "space in the WiFi spectrum" for your StageWave router.
Remember to configure musicians' devices
Your router is now ready to be used with StageWave, but remember that devices you use via WiFi must be correctly prepared for StageWave:
- Airplane Mode On.
- Bluetooth and GPS off in the device settings.
- Close other apps.
- Use genuine headphone adapters.
Distribute your musicians' devices across both 5 GHz WiFi networks. For example, if there are 6 musicians connected via WiFi, have 3 musicians use the StageWave 1 network, and the other 3 use the StageWave 2 network.
Where to buy the DLink DIR-3040 router:
You can get this router at your favorite electronics store. Check it out on Amazon for more details!
We hope this article has provided valuable information on setting up your StageWave with a suitable router. Remember, we're here to assist you at every step of your StageWave experience.
If you have questions or need additional assistance, feel free to leave us a message in our chat. We're committed to providing you with the best support to make the most of your wireless monitoring system.
Thank you for trusting StageWave to take your musical experience to the next level!