Live sequences with DAW and Digital Mixer
Backing tracks and sequences with StageWave
If you are a musician and you have been playing live with your band for a while, this article can be very useful so let's go...
3, 2, 1, INTRO!
What are sequences or backing tracks?
When a musician is missing or your band does not have all the members to play all the instruments of a song, sequences are the way to make the song feel complete, complementing your band with recorded tracks of the instruments you want to sound. and in this way achieve a much more robust sound.
How to use them? different ways
Depending on the need there are different ways to use sequences, for example:
- Use only one track with the metronome or click that can be obtained with a metronome application on the phone, connecting the audio output of the phone to an input on the mixer, such as “Metronome Beats”.
- A metronome track along with the guide and a sequence track using two channels on the mixer, this form is also known as “Split Sequences”.
- Send each track of the sequence as a separate channel from the sound mixer using N channels on the mixer depending on the number of tracks in the sequence.
- A mix of the above, doing track mix sends and other independent tracks.
This time we will be working with a sequence of 6 tracks so we will send each track independently to the Behringer XR18 digital mixer.
Using backing tracks with Reaper
Logic, Ableton, Cubase, etc ... Any DAW software will work, but we will work with Reaper because it has gained a lot of popularity lately.
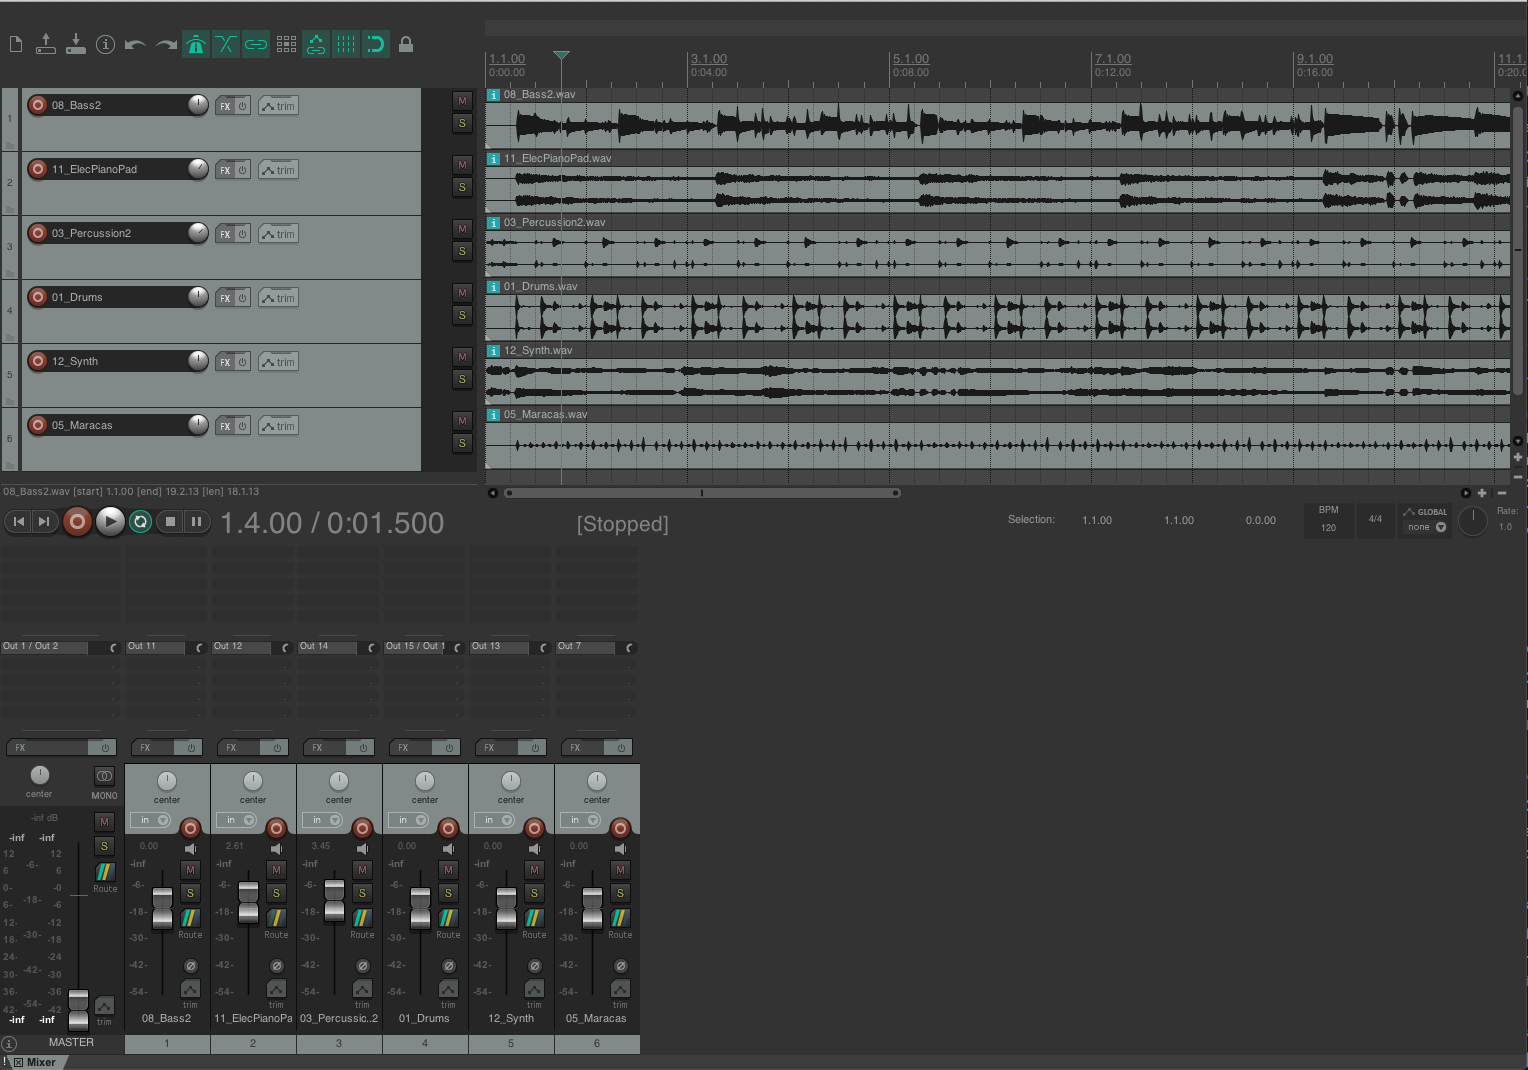
Let's start from the basis that you have the files of the tracks of a song, which can be created by you or purchased from a sequence website. We import each audio file into a Reaper track. The ones that will look like this:
I recommend that you insert the metronome as one more audio track, that way we will have the flexibility to send the metronome through the output we want. For this we add a new Track and then we go to Insert -> Click source, in this way we will already have an audio track with the metronome which we can extend for the entire duration of the project and already having our click track, we can deactivate the metronome by Reaper.
Also if your sequences use virtual instrument tracks, I recommend that you convert them to audio files so that your computer does not use more processing by playing virtual instruments in real time.
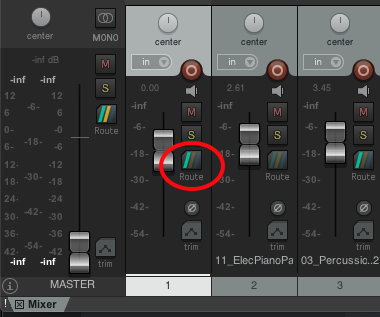
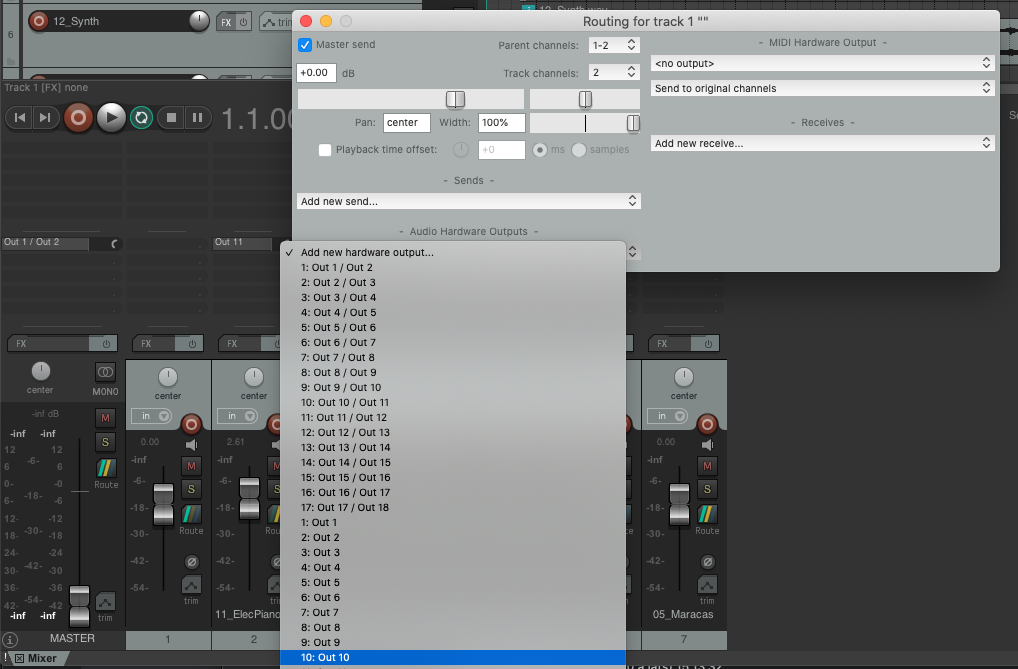
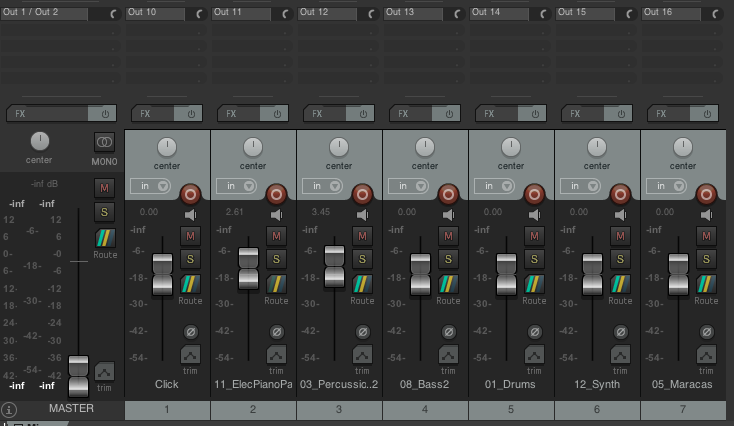
Now is the time to configure the outputs, this project has 6 tracks plus the metronome, so since we will use the first channels of the mixer for the band, we will use channels 10 onwards for our sequences. In each of our tracks in reaper we must assign an output of our audio device. For this we go to the Reaper mixer and in each track we assign a new hardware output by clicking on the Route button of the track and then on “Add new hardware output ”, there we will select the output that we will use for the track. In this case we assign mono outputs from 10 to 16.
We repeat the process for all the tracks and we will have the sequence configured in our DAW.
Setting up the digital mixer to play the sequences
Now we must configure our mixer to use USB outputs as input for the audio signal.
As we are using the XR18 we go to the X Air Edit app and choose the inputs that we will use, we must configure channels 10 to 16 so that they use the USB output of the mixer as a source.
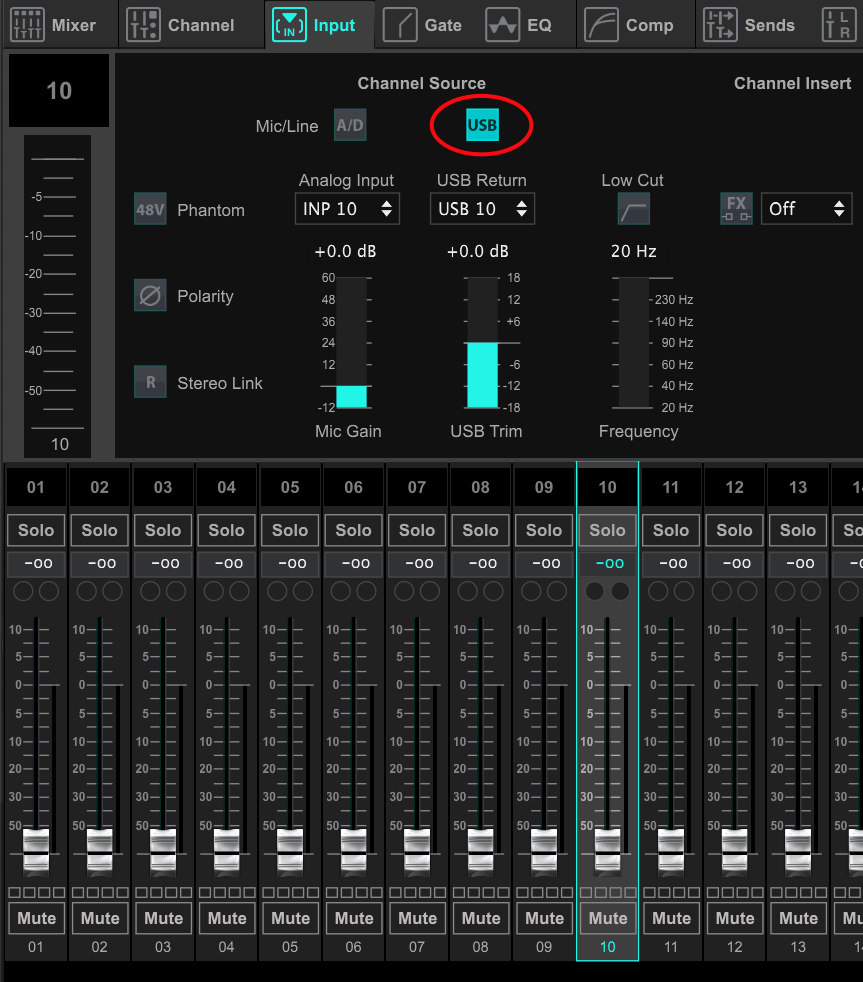
When you finish configuring the mixer and play the sequence in Reaper we will be able to listen to it on the mixer, remember to configure the gain, or in this case trim, of each sequence track to preserve a good gain structure throughout your mix.

You can now include the sequence in the room mix as well as in the musicians' monitoring mixes using auxes or StageWave, he explained how to include the sequence in StageWave a little later.
Here I give you a useful advice, if you need to use audio processing in the sequence tracks, be it compressor, gate, EQ, effects, etc ..., do it directly on the mixer, in this way you will not overload your computer and avoid that this suddenly stop working.
Using your backing tracks in StageWave
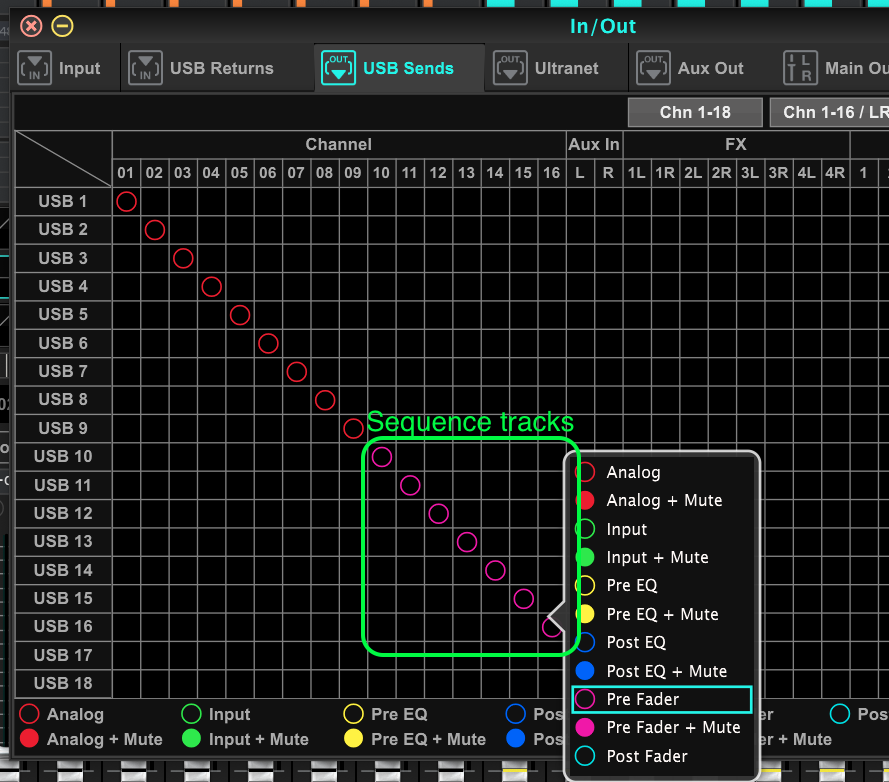
Using StageWave each musician has the freedom to handle their monitor mix however they like best and this includes sequence tracks. The first thing we must do is go to the routing configuration of the mixer, more specifically to the USB sends, there we configure each channel that corresponds to a sequence track as Pre Fader, in this way the tracks sent from Reaper to the mixer are they will be sent back by USB sends and StageWave will have access to them.
For Windows users: You need to configure Reaper to use the same ASIO settings as StageWave
This will allow you to use Reaper and StageWave at the same time without conflict with the XR18's ASIO driver. For this in Reaper we go to "Options> Preferences" and in the preferences panel we go to "Device" found in the "Audio" section.
Once inside StageWave, we choose our digital mixer as the audio input and start naming each channel, the sequences will already be available on channels 10 to 16.
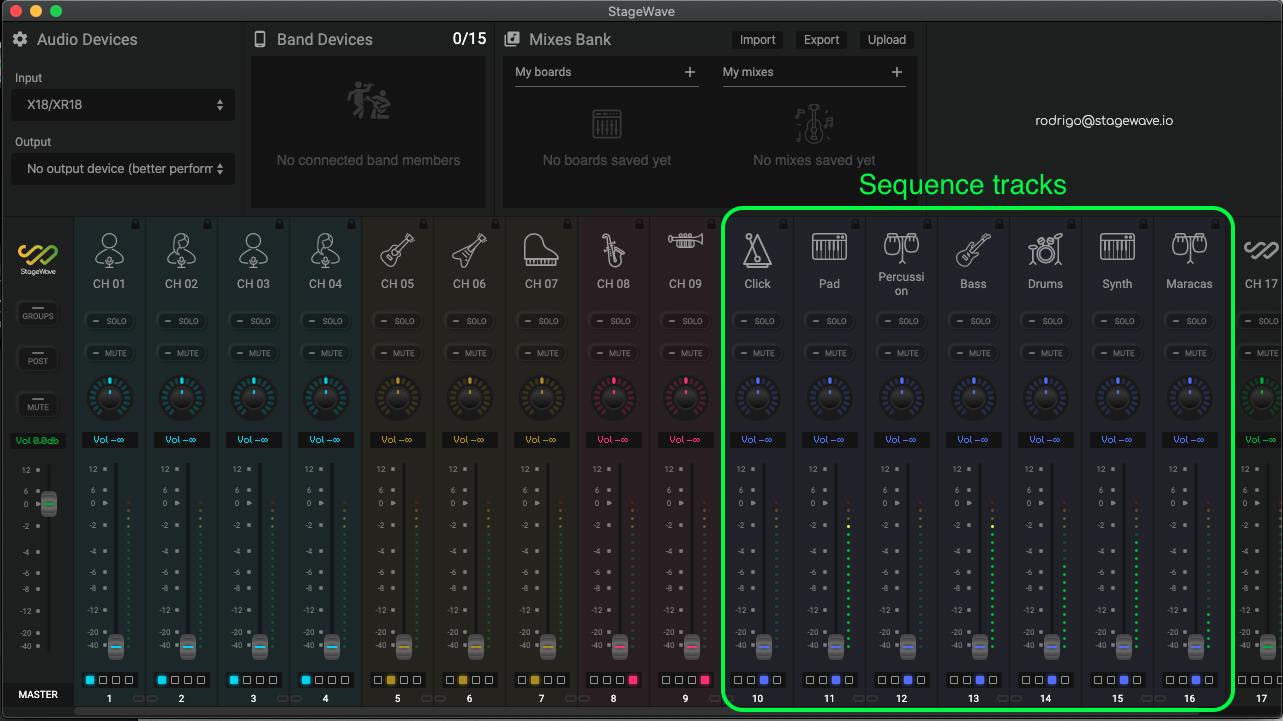
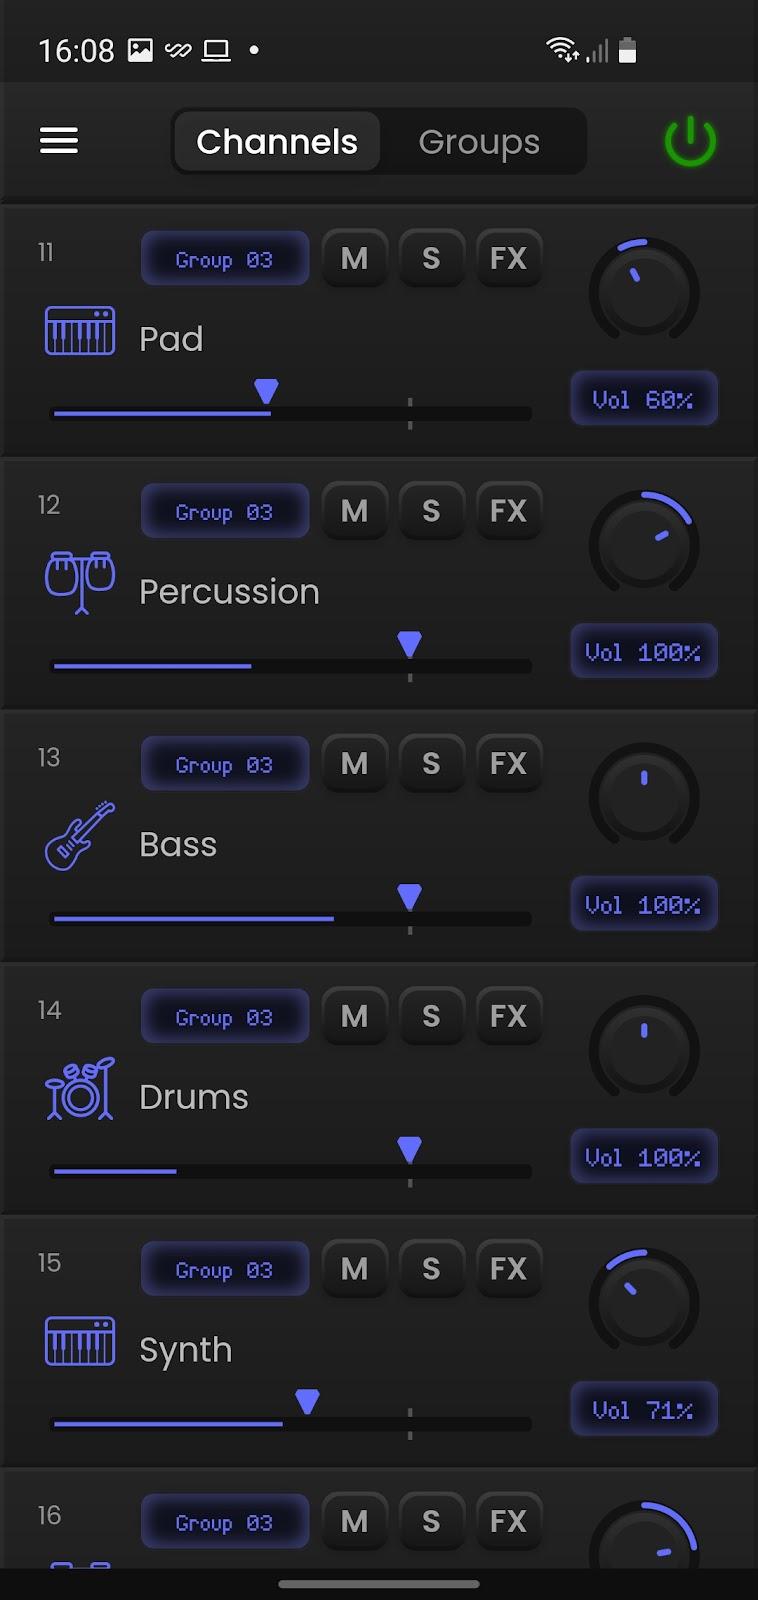
By connecting our phone using the StageWave mobile application we can control and listen to our monitoring mix directly from it, edit volumes, pan, create channel groups, etc ... All this including both the mixer inputs and the sequence tracks that we have just finished. to prepare for what as musicians, we have full control of what we want to hear in our ears.
I hope this article has been helpful and encourages you to go one step further and include sequences in your presentations and rehearsals. If you have any questions, do not hesitate to contact us through the chat on the website or on our social networks.